
How to Trigger Events Using Visual Tagger
The Visual Tagger is a small widget that loads on top of your website and lets you visually point and click on any element (button, form etc.) and track it to trigger an event when its interacted with.
It is the fastest way to set up tracking in PixelFlow, and it can also capture customer details shown on the page such as name, email, phone number, value, and product information.
Visual Tagger can capture a lot of useful event data when the details are visible on the page or inside the form you select. If it doesn't work (there are some edge cases) you can use alternative methods to trigger events.
A few points to note before getting started:
You can only load Visual Tagger from the PixelFlow dashboard.
Only you can see Visual Tagger on your website - no visitors can see it.
What Visual Tagger can capture
Visual Tagger is not limited to the click itself. When you track a form or select a visible data area, PixelFlow can send extra customer and event details to Meta along with the event.
name
email
phone number
value
product name or other visible product details
This is especially useful for lead forms, booking forms, newsletter signups, and product actions where better event match quality matters.
How to Launch the Visual Tagger
Click Track More Events in the top right of your dashboard.
Select Via Visual Tagger and click Next.
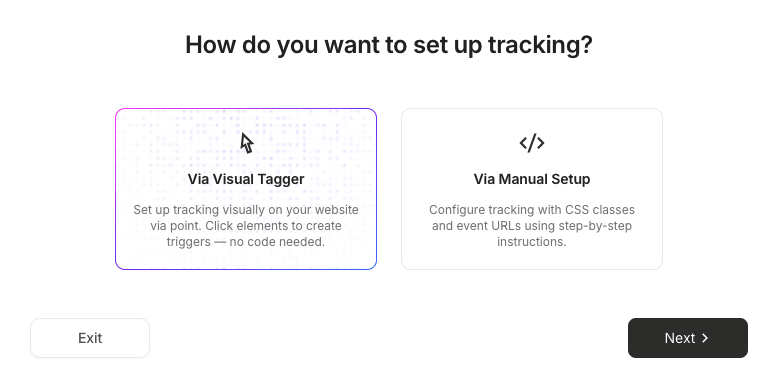
Your website will open with the Visual Tagger widget loaded.
Click Track Something New in the widget and select the element, button, or form you want to track.
Track a button or element click
With When the Element is Clicked selected, click the button, image, or element you want to track.
Choose the Meta event to trigger.
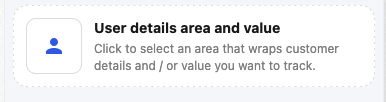
If related details are visible on the page, select User details area and value and click the area that contains that information. PixelFlow can send details like name, email, product information, or value with the event.
To send a fixed value, click Add Fixed Value and enter the amount.
Click Save Trigger.
Note: Duplicate Buttons/Elements Are Tracked
PixelFlow identifies a click trigger by the visible label on the element. Labels are normalized (case and extra spaces ignored), so Add to cart" and "add to cart" are treated as identical - this means if you have a trigger setup on an "Add to cart" button, any other buttons called "add to cart" will also trigger the event. See the exact breakdown of different scenarios below:
Example | What to do |
|---|---|
Every product card has "Add to cart" | One trigger covers all of them. Click any one to set it up. |
One button says "Start", another says "Start now" | Create a separate trigger for each label, or update your site so the wording matches. |
"Add to cart" appears as a button and as a text link | Set up one trigger from the button and one from the link, unless you've confirmed one covers both. |
No readable text / icon only elements (eg. A heart icon or cart icon with no label) | Click the icon in the Visual Tagger and PixelFlow will track it using the element itself. |
Two triggers both set up for "Add to cart" button | Avoid this -- the same click can be counted twice. |
Track a form submission
Select "When the Element is Clicked" and then click the submit button on the form.
Note: the event triggers only after a successful submission.
Choose the event type from the dropdown.
Visual Tagger will automatically find form fields to track, such as name and email. Check the matches before saving.
If a field is missing, click Track extra data and select the extra field or area, such as phone number or another visible value.
Review the Confirm Setup screen and click Confirm.
Alternative Methods for Triggering Events
The Visual Tagger will work in the majority of tracking cases. If you experience an edge case where its not possible to track your required setup, see the full list of methods to trigger events on your website here.
View More Information