
How to Track & Trigger Events
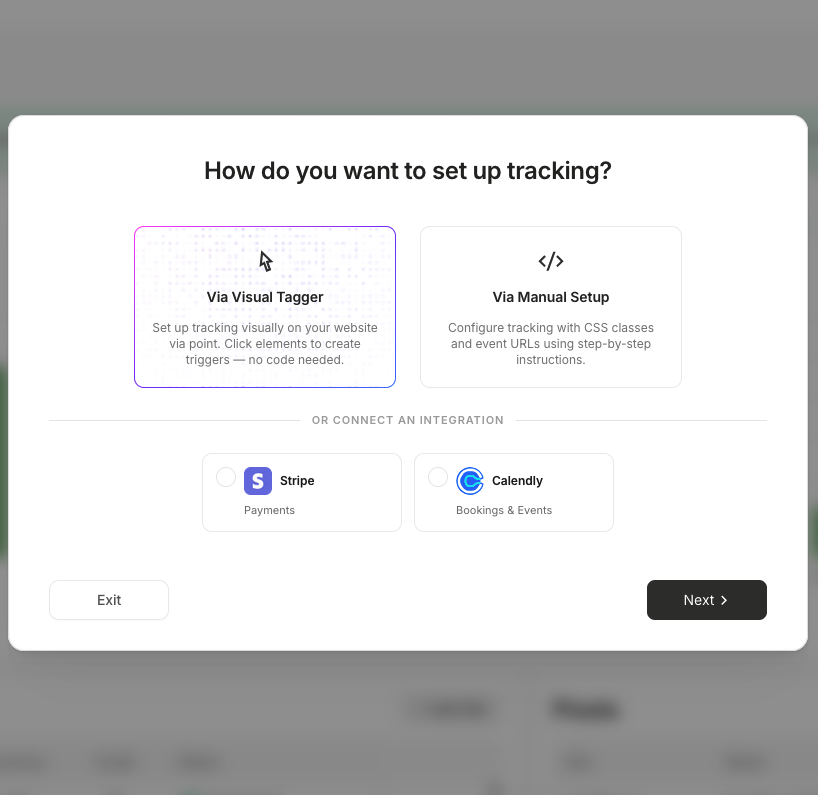
There are 5 different ways you can track and trigger events from your website or app:
Visual Tagger: Best for buttons, forms, popups, and other on-page interactions. This is the recommended option for most users.
Integrations: If you use Stripe or Calendly, just use our simple integrations to autosync and trigger events from 3rd party platforms
URL Triggers: Best for thank-you pages, booking confirmations, and other page-load milestones
Manual tagging with CSS classes: Best when you need more control, richer data capture, or a fallback for setups where Visual Tagger is not the right fit.
Programmatic API: If you are a developer wanting granular control of triggering events via your website or app.
Recommendation: Use Visual Tagger for the simplest setup.
Comparison of Different Ways to Trigger Events on your Website
Tracking Type | Pros | Cons |
|---|---|---|
Visual Tagger |
|
|
Integrations |
|
|
URL Triggers |
|
|
Manual Tagging (CSS Classes) |
|
|
Programmatic API |
|
|
The Visual Tagger - Use for Most Event Tracking
The Visual Tagger is the simplest way to set up event tracking on most no-code sites.
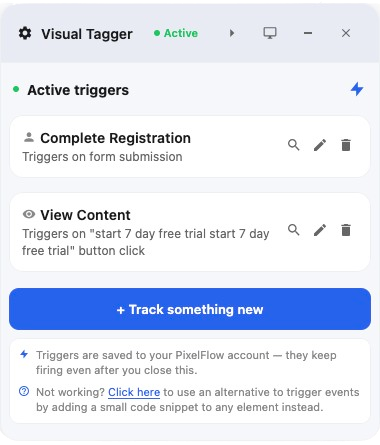
It works well for:
button clicks
form submissions
newsletter signups
lead forms
booking buttons and popups
Use it when you want to set up tracking quickly without editing classes on each element.
There may be some edge cases where it will not work, in which case you can use the below options.
URL Trigger - Use for Success Pages / ViewContent Pages
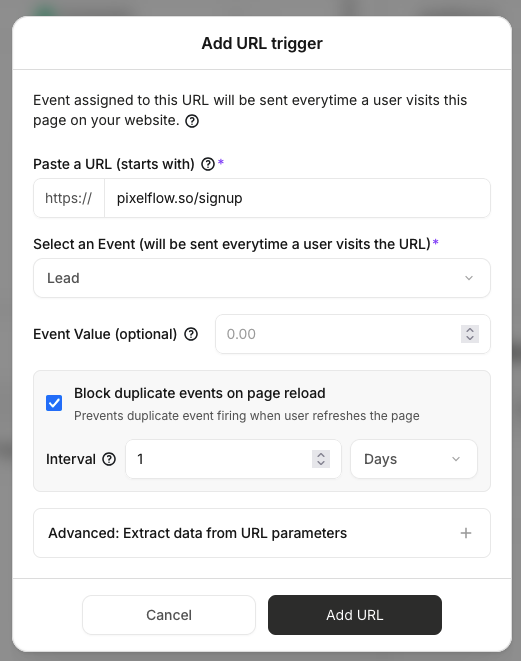
URL Triggers:
Good fit for
/thank-youand/booking-confirmedpagesPerfect for triggering
viewcontentevents (eg. trigger on/shopto trigger on all product page URLs that start with/shop)Tip: Use Visual Tagger to setup in these situations so you can also track product information on pages tooSimple to set up
Less accurate for on-page forms, modals, or buttons that do not load a new URL
If users can reload or revisit the page, use Event Blocking Rules to reduce duplicates.
URL Triggers work best when a conversion ends on a unique page, such as a thank-you page after a purchase or a confirmation page after a booking. If a user has completed a form before getting to your success page, you will get better tracking results by tracking the form rather than the success page.
Manual Tagging with CSS Classes - Use For More Control

Adding "CSS classes" to elements is the fallback method when using Visual Tagger doesn't work. You can:
capture form fields like name, email, phone, or value
tag custom components that need precise control
track eCommerce elements with product details
Its ideal if you consistently make layout changes to your website as classes will be more likely to remain on buttons/forms.
Manual tagging is more hands-on, but it gives you stronger control over how events fire and what data PixelFlow captures. Its the best method to use if the Visual Tagger cannot capture the data.
Manual tagging takes more setup than Visual Tagger
Integrations - Use for Stripe Purchases & Call Bookings
Our integrations offer a direct connection from 3rd party platforms like Stripe or Calendly so you can trigger events only when an action has occured somewhere else. For example:
A customer has made a purchase in Stripe
A customer has booked a call with you
They are the perfect source of truth and with Stripe in particular, you can get even more data sent along with your event as Stripe sends everything they received from the customer like zip code, phone number etc.