
Trigger Events from Stripe Payments
Use the Stripe integration to send purchase and subscription events to Meta automatically when payments complete in Stripe. This is the simplest way to track Stripe sales without building a custom setup.
Before you start, make sure your site is already connected in PixelFlow and you have access to create a restricted API key in Stripe.
Connect Stripe
In your PixelFlow dashboard, go to Events and click Add Trigger.
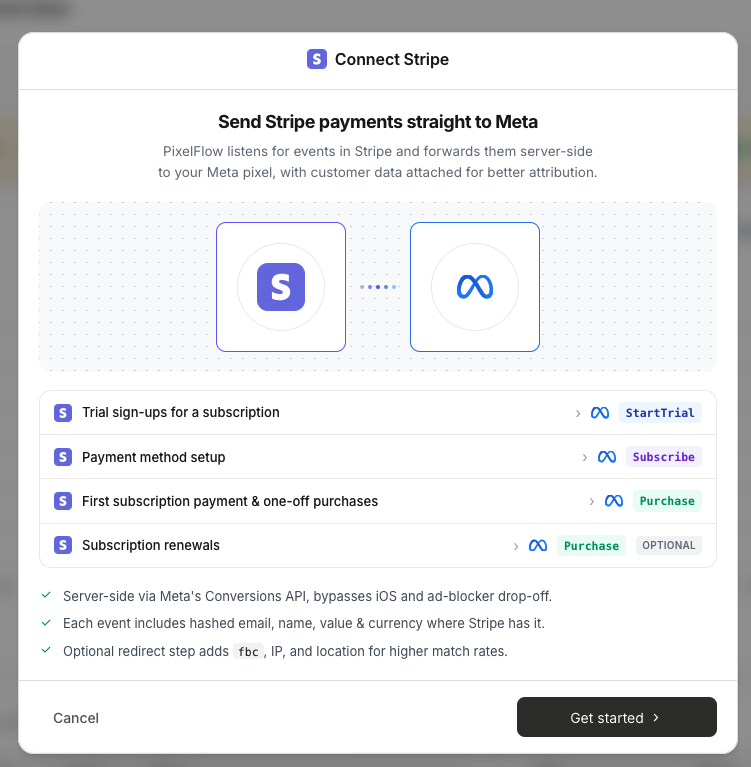
Choose Stripe Payments from the integration options.
The Connect Stripe modal explains how PixelFlow forwards Stripe events to Meta with customer data attached for better attribution.
Choose which events to send
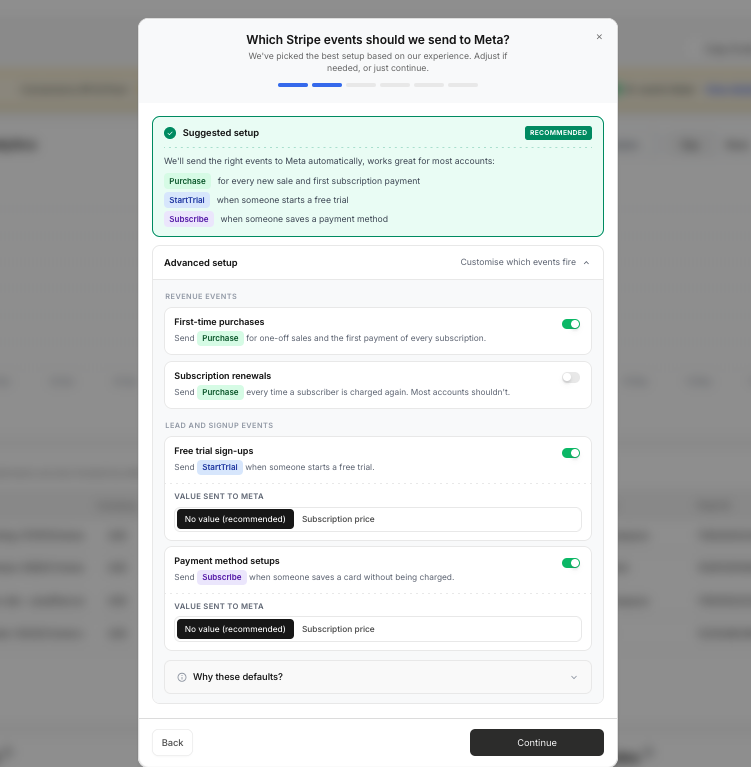
PixelFlow shows a recommended setup that works well for most accounts. You can customize it if needed.
Suggested setup
By default, PixelFlow enables:
Purchase — for every new sale and the first payment of every subscription.
StartTrial — when someone starts a free trial.
Subscribe — when someone saves a payment method without being charged (setup mode).
Advanced setup
Click Customise which events fire to adjust the options:
Revenue events
First-time purchases (on by default) — Send a Purchase event for one-off sales and the first payment of every subscription.
Subscription renewals (off by default) — Send a Purchase event each time a subscriber is charged again. Most accounts don't need this enabled.
Lead and signup events
Free trial sign-ups (on by default) — Send a StartTrial event when someone starts a free trial. Choose whether to send no value (recommended) or the subscription price as the event value.
Payment method setups (on by default) — Send a Subscribe event when someone saves a card without being charged. This happens when a Stripe subscription is configured in setup mode, such as "add payment details now, get charged later." Choose whether to send no value (recommended) or the subscription price as the event value.
Purchase events are not sent to Meta if the payment value is $0
Add your Stripe restricted API key
PixelFlow needs a restricted key to create webhooks in your Stripe account. This takes about a minute.
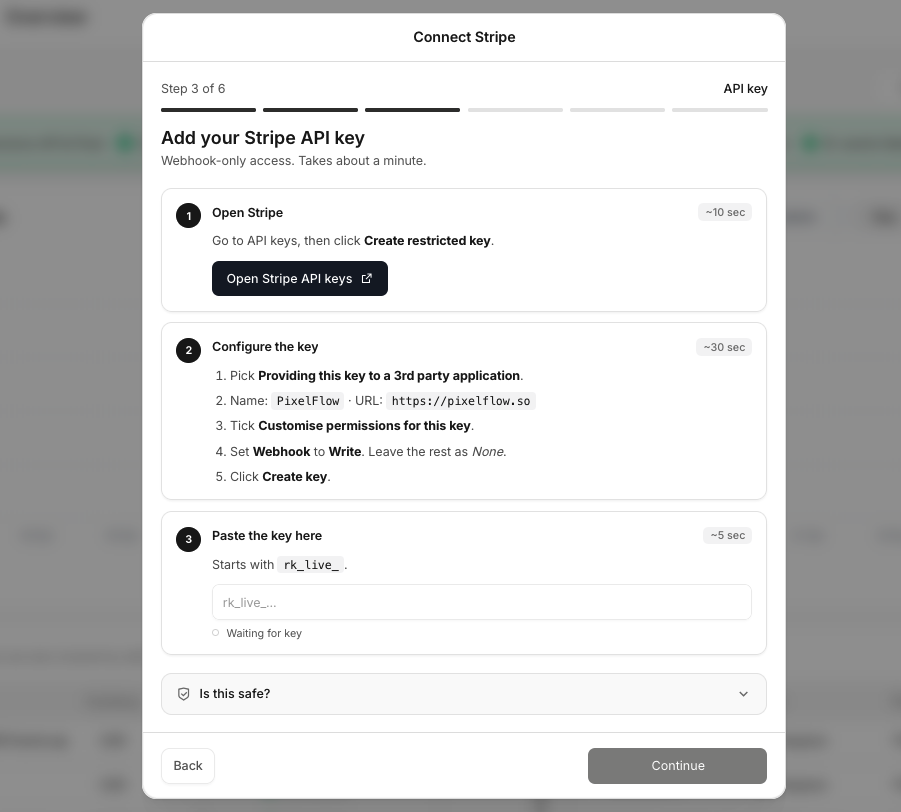
Click Open Stripe API keys to go directly to the right page in Stripe.
Click Create restricted key.
Choose Providing this key to a 3rd party application, set the name to PixelFlow and URL to pixelflow.so.
Check Customise permissions for this key, set Webhook to Write, and leave all other permissions as None.
Click Create key, then paste the key (starts with
rk_live_) into PixelFlow.
The restricted key can only create and delete webhooks — PixelFlow cannot access the rest of your Stripe account.
Select your payment method
Choose how you're collecting payments in Stripe so PixelFlow can show you the exact setup steps.
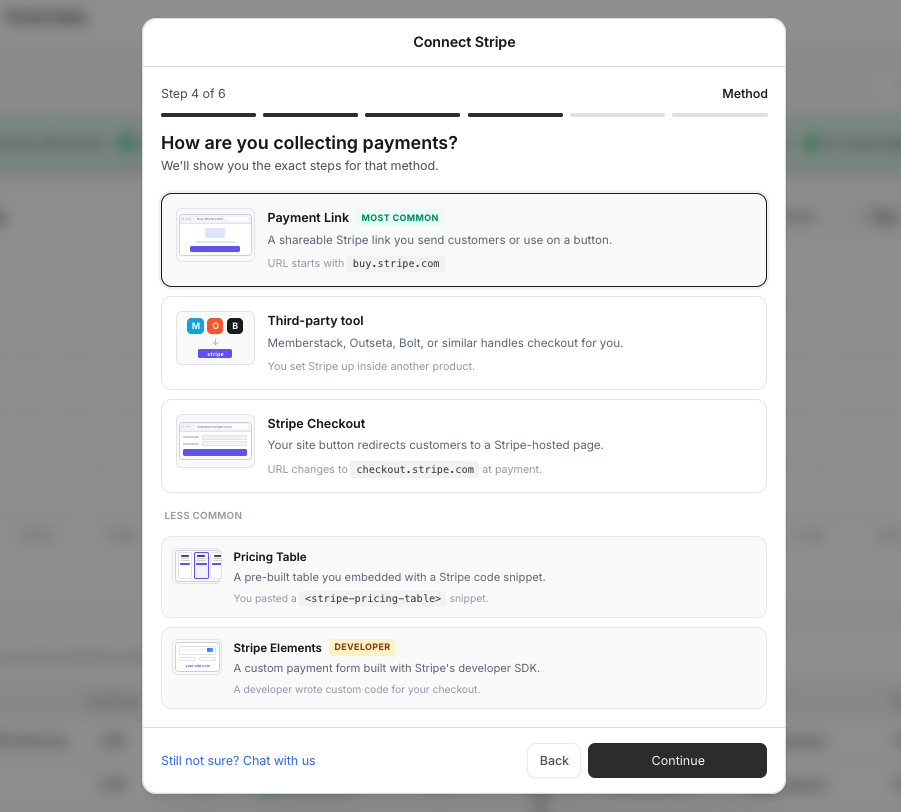
Payment Link — A shareable Stripe link (starts with
buy.stripe.com) you send customers or use on a button. Most common.Third-party tool — Memberstack, Outseta, Bolt, or similar handles checkout for you.
Stripe Checkout — Your site redirects customers to a Stripe-hosted page (URL changes to
checkout.stripe.com).Pricing Table — A pre-built table embedded with a
<stripe-pricing-table>snippet.Stripe Elements — A custom payment form built with Stripe's developer SDK.
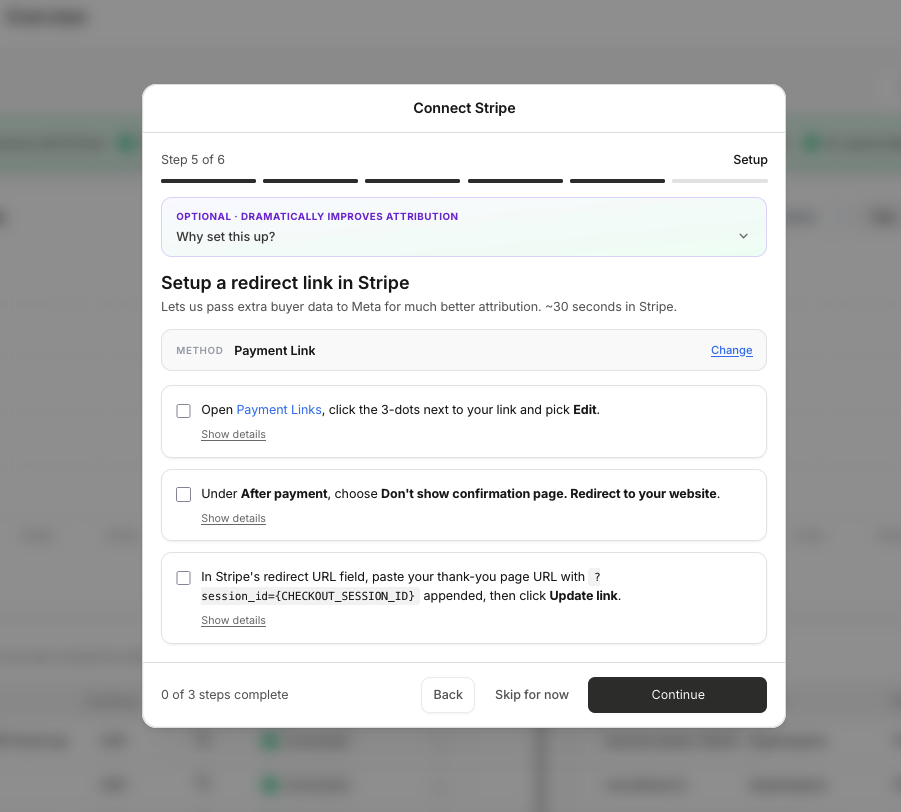
Set up a redirect link (optional but recommended)
This optional step dramatically improves attribution by passing extra buyer data to Meta. It takes about 30 seconds in Stripe. The exact steps differ depending on your Stripe checkout setup, so select your Stripe setup and follow the instructions.
Review and connect
The final step shows a summary of your setup before connecting.
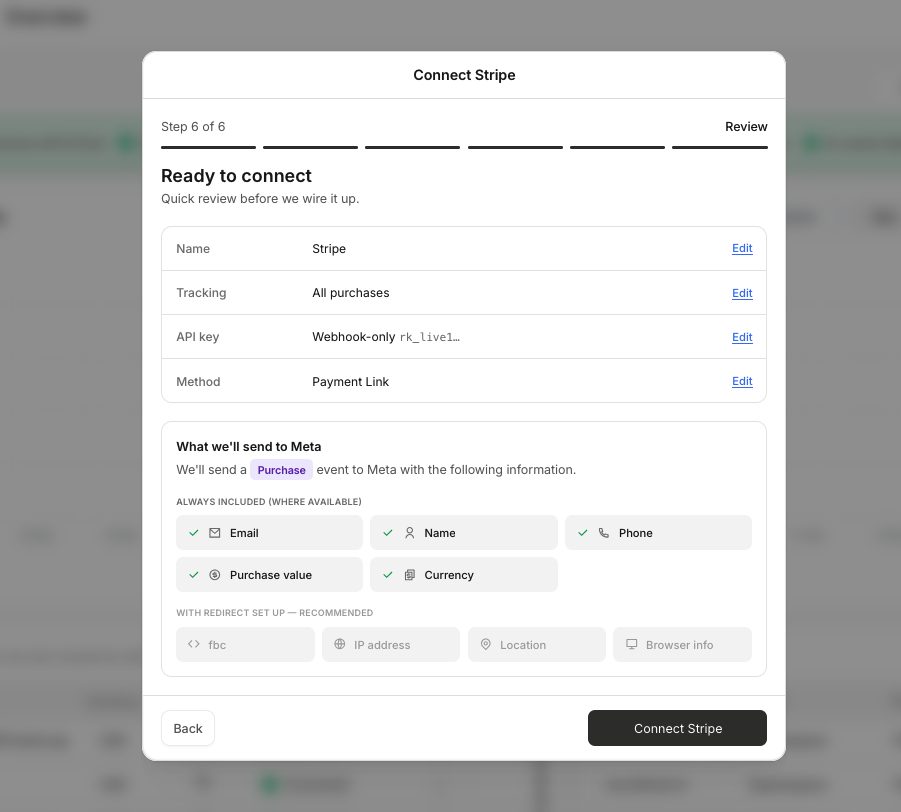
Click Connect Stripe to finish the setup.
What data is sent
When an event fires, PixelFlow sends it to Meta with:
Email address
Name
Phone number
Purchase value (for Purchase events)
Currency
Content Type
If you set up the redirect link after Stripe, PixelFlow also includes:
IP address
City, State, Zip Code & Country
fbc (if the user came from a Facebook ad)
External ID
User Agent
fbp
Events are deduplicated automatically. If Stripe sends the same payment multiple times via webhooks, PixelFlow sends only one event to Meta.
Test the connection
Complete a test payment in Stripe.
Open your PixelFlow Events Log and confirm the event appears.
Check Meta Events Manager to verify the event arrives there as well.
For a full testing workflow, see How to Test and Verify Your PixelFlow CAPI Setup.
What to do next
Track bookings with Trigger Events from Calendly Bookings
For URL-based confirmation pages, see How to Trigger Events When a Page is Loaded
For custom event logic, use the Programmatic Tracking API