
Trigger Events from Calendly Bookings
Use the Calendly integration to send a Schedule event to Meta each time someone books through Calendly. This is the fastest way to track bookings without relying on manual URL triggers.
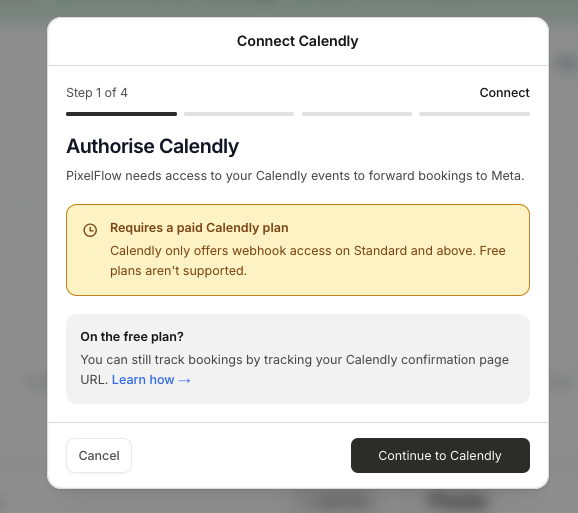
Calendly webhooks are required for this integration. Calendly only supports webhooks on paid plans (Standard and above), so free Calendly accounts cannot use this method.
Step 1: Authorize Calendly
In your PixelFlow dashboard, go to Events and click Add Trigger.
Choose Calendly Bookings & Events.
Click Continue to Calendly to authorize PixelFlow's access to your Calendly events.
PixelFlow needs access to your Calendly events to forward bookings to Meta via webhooks.
On the free Calendly plan? You can still track bookings by triggering events from your Calendly confirmation page URL. See Trigger Events from Calendars & Call Bookings for the redirect method.
Step 2: Map your booking to a Meta event
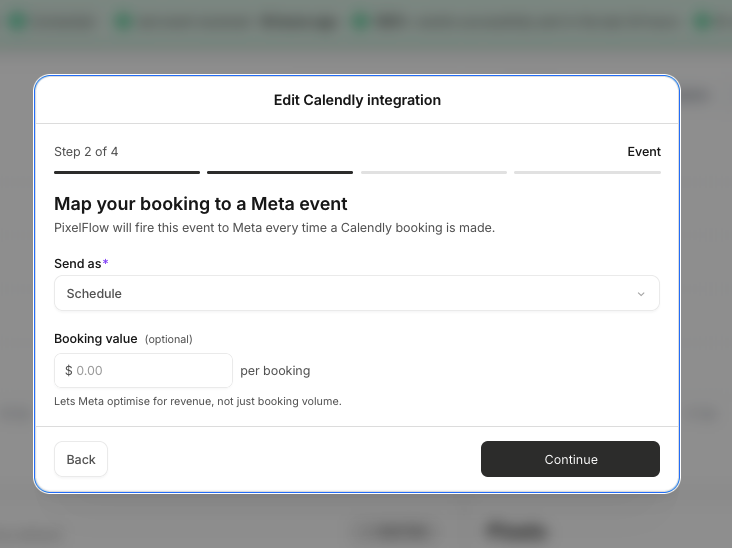
In the Send as dropdown, choose Schedule. This is the event name PixelFlow sends to Meta for each booking.
Optional: Add a Booking value to let Meta optimize for revenue instead of just booking volume.
Click Continue.
Step 3: Set up a redirect in Calendly (optional but recommended)
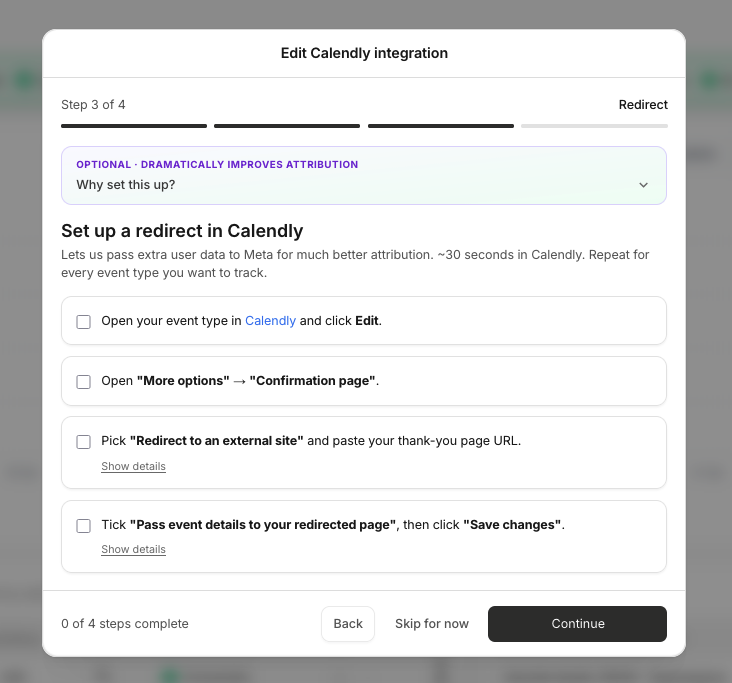
Setting up a redirect in Calendly lets PixelFlow pass extra user data to Meta for much better attribution. This step takes about 30 seconds in Calendly.
Repeat these steps for every event type you want to track:
Open your event type in Calendly and click Edit.
Open More options → Confirmation page.
Pick Redirect to an external site and paste your thank-you page URL.
Tick Pass event details to your redirected page, then click Save changes.
You can skip this step and return later, but attribution accuracy will be lower without the redirect.
Step 4: Review and connect
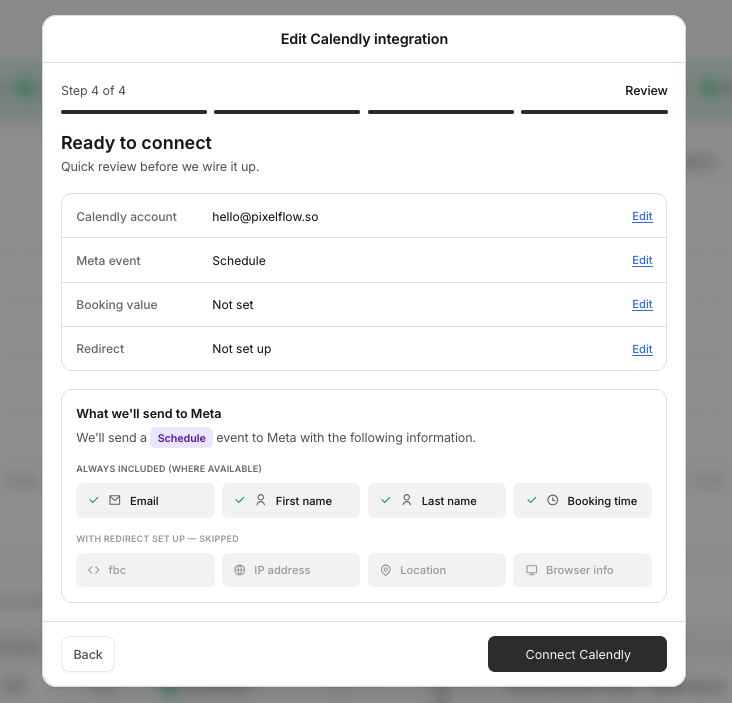
Review your settings before connecting:
Calendly account — the account you authorized
Meta event — the event name sent to Meta (e.g., Schedule)
Booking value — whether a value is attached to each booking
Redirect — whether the Calendly redirect is set up for better attribution
Click Connect Calendly to activate the integration.
What data PixelFlow sends
Calendly passes booking data to PixelFlow, which then sends it to Meta to improve event match quality:
Email
First name
Last name
Booking time
If you set up the redirect, PixelFlow can also send additional attribution data including fbc, IP address, Location, and Browser info.
Only data provided by the booker is sent. PixelFlow doesn't add any additional data beyond what Calendly provides.
Note: We combine data from browser and server events and send data serverside to Meta. Events do not have to be sent via browser & server if the server side event contains enough data and Meta treats serverside datat as the gold standard.
Test the setup
Book a test meeting through Calendly.
Check your PixelFlow Events Log for the Schedule event.
Verify the event appears in Meta Events Manager (this can take up to 48 hours for new events).
For a full testing workflow, see How to Test and Verify Your PixelFlow CAPI Setup.
Using Cal.com or another calendar tool?
If you use Cal.com, TidyCal, or another calendar platform, you can track bookings using redirect-based URL Triggers. Cal.com supports custom redirect URLs with booking data parameters on all plans. See Trigger Events from Calendars & Call Bookings for setup instructions.
What to do next
To track more events from your website, see How to Track & Trigger Events. For Stripe payments, see Trigger Events from Stripe Payments.