
Enabling Meta Test Events Mode
Use Meta Test Events mode to watch your PixelFlow events arrive in Meta Events Manager in real time, before you rely on the data for live campaigns. Test events are a live check only: they don't affect your ad performance or reporting.
Copy the test code from Meta
In Meta Events Manager, open Data Sources and select the Pixel you want to connect with PixelFlow.
Click Test Events.
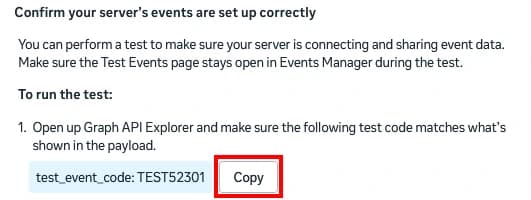
Under Confirm your server's events are set up correctly, click Copy.
Turn on test mode in PixelFlow
In PixelFlow, go to Sites & Pixels
Edit your pixel
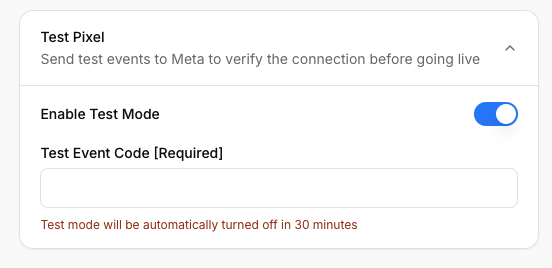
Select "Enable Test Mode"
Paste the test code into the Test Event Code box.
Click Save Pixel
Check the test events
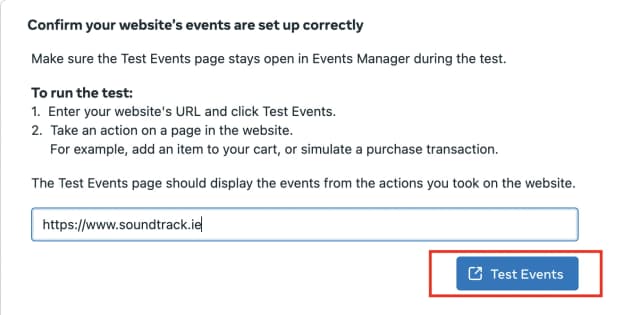
Back in Meta Test Events, under Confirm your website's events are set up correctly, paste your website URL and click Test Events.
Your website opens in a new browser tab. Refresh it, navigate through different pages, visit your configured tracking URLs, and interact with the elements you set up with classes.
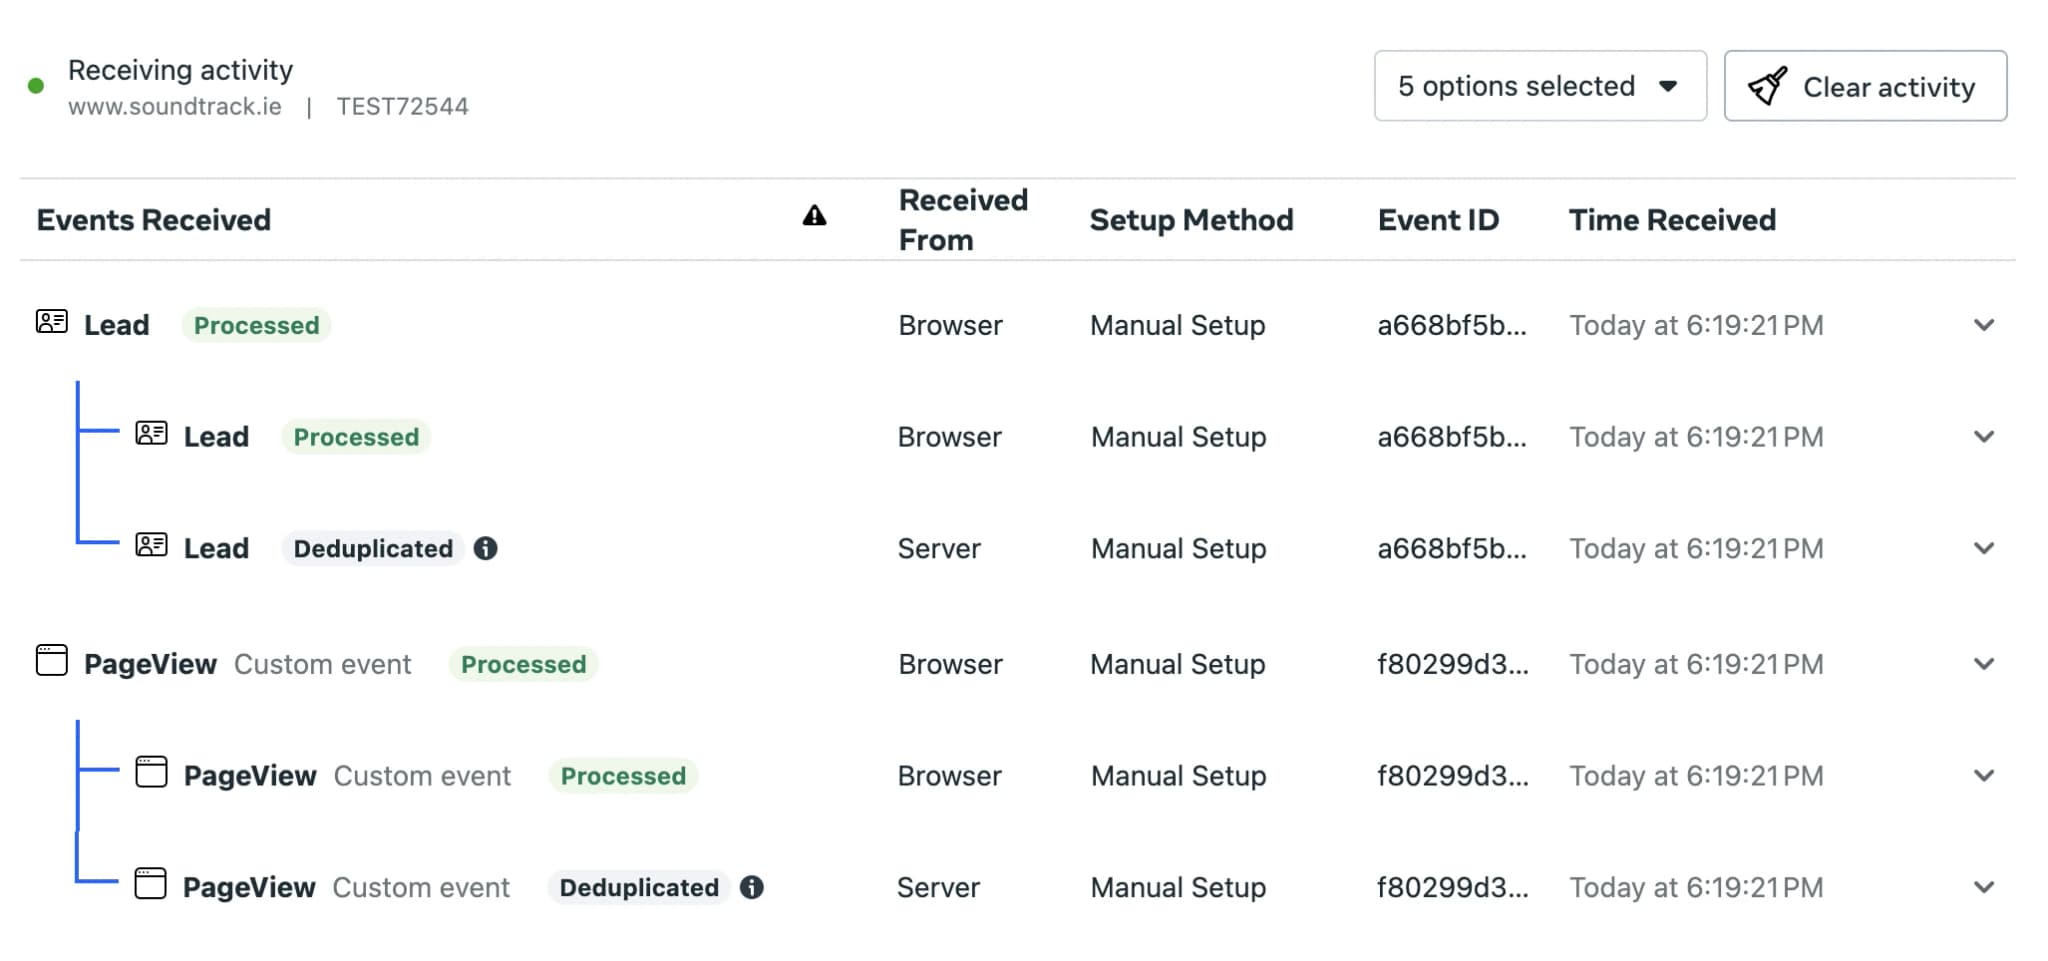
Back in Meta Test Events, check that both Browser and Server events are received.
After a few minutes, Meta deduplicates the matching events using the shared event ID PixelFlow sends with every event and marks them Deduplicated. That confirms your setup is working correctly.
Test Events mode turns off automatically 30 minutes after you enable it, or you can turn it off straight away in the edit Pixel modal. Once it's off, your events start appearing in the Overview tab in Meta Events Manager; this can take up to 40 minutes.