
Webflow Setup (Using Plugin)
This article guides you through the process of how to set up the Facebook Conversions API on Webflow using the PixelFlow Webflow plugin.
Note: If you use Webflow Commerce, we can automatically track your eCommerce events. See more information in the Auto track Webflow eCommerce events guide.
Note: We suggest following the setup guide without plugin as its now a smoother installation with one click setup. Follow our Webflow Setup (without plugin) guide here.
If you would like to continue with the setup using the PixelFlow Webflow plugin, installation steps are below.
1. Install the PixelFlow App from Webflow Marketplace
Visit the PixelFlow Webflow app in the Webflow Marketplace
Click Install App or Login to Install
Choose which site or directory to install the app into
Click Authorise App to grant PixelFlow permission to access your Webflow site
2. Launch the PixelFlow App in Webflow
Open your Webflow dashboard and hover over the site you want to use PixelFlow on
Click Open in Webflow to open the Webflow editor
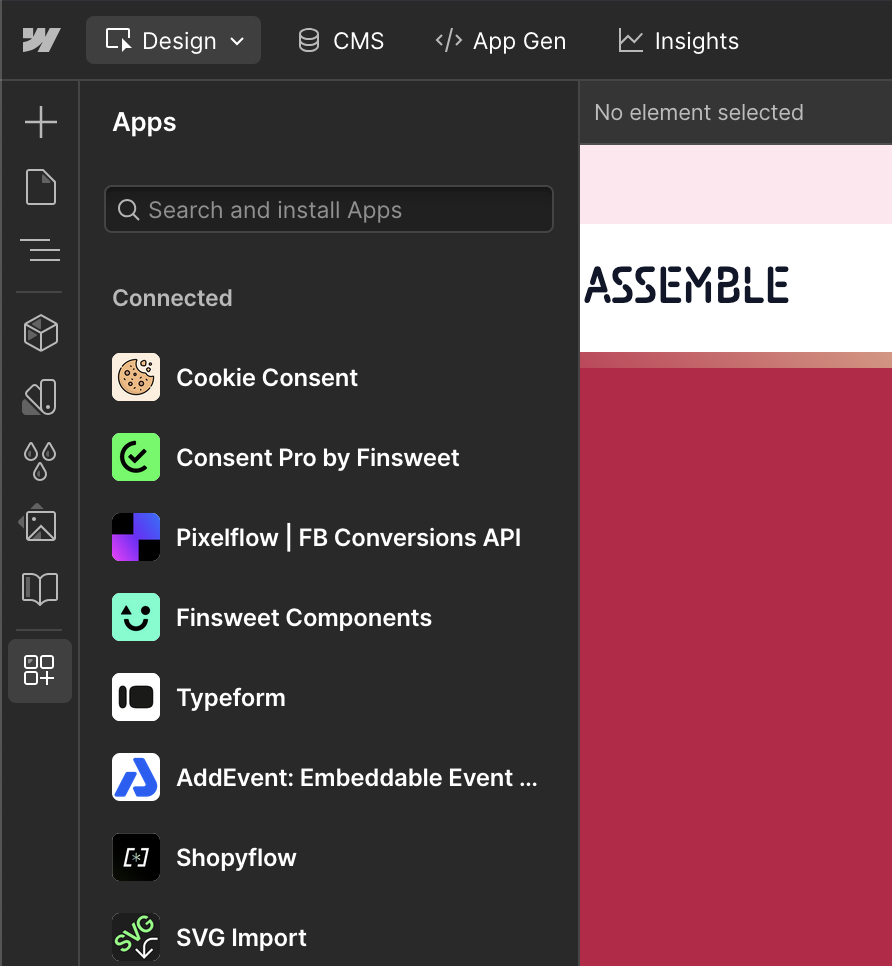
In the left sidebar, ensure you're in Design Mode
In the left sidebar, click the Apps icon
Select PixelFlow from the installed apps list
Click Launch App
Where to find Design Mode: Design Mode is located in the top-left corner of the Webflow editor. Make sure it's selected (not "Preview" or other modes) before accessing the Apps menu.
3. Login to the Plugin
When you launch the app, a browser window will open asking you to authenticate with PixelFlow.
For existing PixelFlow users:
Log in with your email and password, OR
Click Sign in with Google
For new users:
Click Create account and register with your email and password, OR use Sign in with Google
Complete registration and wait for the automatic redirect back to Webflow
Session expires after 5 minutes: You have 5 minutes to complete the authentication process. If you take longer, the session will expire and you'll need to relaunch the app from Webflow to generate a new session.
Google account already in use? If you see an error saying "An account with this email already exists," it means you previously created a PixelFlow account with email/password. Log in using your email and password instead of Google OAuth.
4. Wizard Auto-Opens: Autosync or Manual Site Sync
After successful authentication, the PixelFlow setup wizard in your dashboard will automatically open and guide you through the remaining steps.
Automatic Sync (recommended):
PixelFlow will attempt to automatically detect your Webflow site information
If successful, your site domain will be pre-filled
Manual Entry (if autosync fails):
If automatic detection doesn't work, you'll see a warning message
Manually enter your website domain (e.g., https://www.mysite.com)
The wizard uses a 4-step process with visual navigation to guide you through setup. You can move between steps as needed.
5. Add Site Domain and Currency
In the first step of the wizard, configure your site details:
Confirm or enter your website domain (e.g., https://www.mysite.com)
Select your currency from the dropdown (optional, used for eCommerce tracking)
Click Continue or Next to proceed
Your Webflow site is now registered in PixelFlow and will appear in your Sites list in the dashboard.
5. Add Your Meta CAPI Acess Token
PixelFlow loads BOTH your Facebook Pixel and Facebook Conversions API simultaneously with automatic event deduplication. This ensures the most accurate tracking while bypassing ad blockers and iOS restrictions.
Enter a Pixel Name (can be any name for your reference, e.g., "Main Website Pixel")
Add your Meta Pixel ID (also called Dataset ID; find this in Facebook Events Manager)
Add your Meta Pixel Access Token (go to Meta Events Manager > Datasets > select your dataset (Pixel) > Click Settings > Scroll down to Setup Direct Integration section > Click Generate Access Token > Copy it and paste into PixelFlow)
Click Next
Need help finding your credentials? Check out our guide: How to Find Your Meta Pixel ID and Access Token
6. Copy and Paste Embed Code to Your Site
In the third wizard step, PixelFlow generates a unique tracking script for your Webflow site.
Copy the script:
In the wizard, click the Copy Script button
The script will be copied to your clipboard
Add to Webflow Custom Code:
Go to your Webflow dashboard and click All Sites
Hover over your website and click the Settings (cog) icon
In the left sidebar, scroll down to Custom Code and click it
Paste your PixelFlow script in the Head Code section
Click Save Changes
Publish your site:
In the Webflow editor, click the Publish button in the top right corner
Select your production domain (your live website)
Click Publish to selected domains
7. Interact with Your Site and See Confetti
The final wizard step helps you verify your setup is working correctly.
Visit your live website in a new browser window or incognito/private mode
Navigate to a few pages on your site (e.g., homepage, then click some links)
Return to the PixelFlow wizard—it will automatically poll for events every 10 seconds
When the first Page View event is detected, you'll see:
A confetti animation (purple, pink, and blue particles from center screen)
A green congratulations modal: "Congratulations! Your Webflow site is now connected to PixelFlow"
The wizard will close automatically
Your site status will change to "Connected" in the Pixels table on your Overview page
Setup complete! PixelFlow is now tracking Page View events on your website. Events should appear in your PixelFlow dashboard within 2-3 minutes.
No events appearing? If you don't see events after a few minutes, verify that:
You published your Webflow site to your production domain
The script is correctly pasted in Settings → Custom Code → Head Code
You're visiting the live site (not the Webflow preview)
Additional verification:
Check the Events page in your PixelFlow dashboard
Check Facebook Events Manager to confirm events are arriving (look for both "Browser" and "Server" events)
For detailed verification steps, see How to Test and Verify Your PixelFlow CAPI Setup.
Setup Additional Tracking
After the wizard closes, you can configure additional event tracking beyond Page Views.
Available tracking options:
Event Classes: Track form submissions, button clicks, and custom interactions using CSS classes—see How to Track Events
Tracking URLs: Track specific page visits, button clicks, or link interactions
Calendly Integration: Automatically track Lead or Schedule events when users book calls
Webflow eCommerce: Auto-track product views, add to cart, checkout, and purchases—see Auto Track Webflow eCommerce Functionality