
Framer Setup (Without Plugin)
This guide shows you how to set up the Facebook Conversions API on Framer by manually adding the PixelFlow script to your site's custom code. This method gives you direct control over script placement without using the plugin.
Want easier setup? The PixelFlow Framer plugin provides automatic installation and management through the Framer Marketplace.
Prerequisites
Framer project access with permissions to edit site settings
Active PixelFlow account (start a free 7-day trial)
Admin access to Meta Business Manager with your Pixel ID and Access Token
Remove any existing Facebook Pixel scripts to avoid duplicate tracking
1. Create Your Site in PixelFlow Dashboard
Log in to your PixelFlow dashboard
Click Add New Site or navigate to the Pixel Setup wizard
Select Framer as your platform
Enter your site domain (starting with https://)
Choose your currency (optional, used for eCommerce tracking)
Click Continue
Your Framer site is now registered in PixelFlow and ready for script installation.
2. Connect Your Meta Pixel
Add your Pixel Name (any name for identification)
Add your Pixel ID (find this in Facebook Events Manager)
Add your Meta Pixel Access Token (generate this in Events Manager Settings)
Confirm you've removed any existing native Meta Pixel
Click Save or Add Pixel
Need help finding credentials? Check out our guide on How to Find Your Pixel and Generate Your Access Token.
PixelFlow loads both your Facebook Pixel and Conversions API simultaneously with automatic event deduplication, so you can safely remove existing Pixel scripts.
3. Copy Your PixelFlow Script
In the PixelFlow dashboard installation step:
You'll see a custom script generated for your site
Click Copy Script to copy the entire code snippet to your clipboard
The script will look similar to this:
<script src="https://cdn.pixelflow.so/script.js?pixel=YOUR_PIXEL_ID"></script>4. Add Script to Framer Custom Code
Now you'll add the PixelFlow script to your Framer site's custom code section:
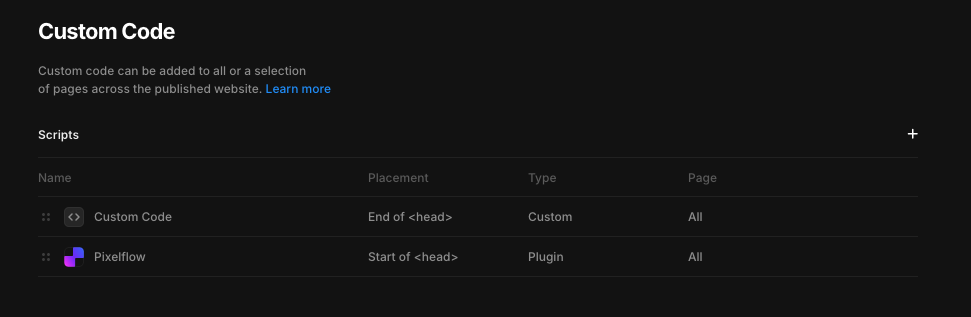
In your Framer project editor, click the Menu icon (three dots) in the top toolbar
Select Site Settings from the dropdown
Select Custom Code and click on the + icon
Enter PixelFlow for name
Select End of <head> for placement
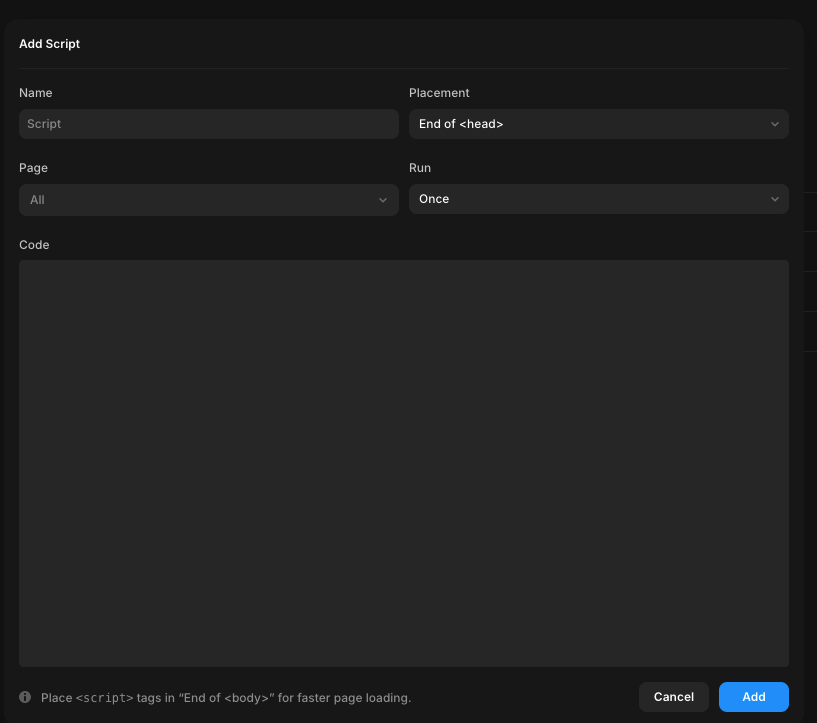
Select All for page and Once for Run
Paste the PixelFlow code snippet into the Code box and press Add
5. Publish Your Framer Site
In the Framer editor, click the Publish button in the top toolbar
Click Update to publish your changes to your live site
Script deployed! The PixelFlow script is now active on your live Framer site and will load on every page.
Automatic updates: Your script will automatically update when PixelFlow releases improvements. Visitors will receive updates immediately, while active users will get them within 1 minutes when the cache refreshes.
6. Verify Your Setup
Test that events are tracking correctly:
Open your live site in a new browser window or incognito/private mode
Navigate to a few pages (homepage, then click around)
Wait 2-3 minutes for events to process
Check the Events page in your PixelFlow dashboard
Verify Page View events are appearing with correct URLs
Check Facebook Events Manager for both "Browser" and "Server" events
Seeing events? Setup complete! PixelFlow is now tracking Page Views on your Framer site.
For detailed verification steps and troubleshooting, see How to Test and Verify Your PixelFlow CAPI Setup.
7. Configure Additional Tracking
After Page Views are working, you can track more events:
Track form submissions and button clicks:
Use Event Classes in Framer Code Overrides
See Event Classes on Framer for detailed setup with TypeScript examples
Track specific page visits or URLs:
Configure Tracking URLs in your PixelFlow dashboard
See How to Track Events for setup instructions
Track calendar bookings:
Connect Calendly or TidyCal for automatic Lead/Schedule events
Configure in your PixelFlow dashboard under Integrations
All tracking is unlimited on every PixelFlow plan—no limits on events, pixels, or subdomains.
Troubleshooting
Symptom | Likely Cause | Solution |
|---|---|---|
No events appearing in PixelFlow dashboard | Script not published or added to wrong location | Verify script is in "End of head tag" and you've published your Framer site. Check browser console (F12) for errors. |
Events not appearing in Facebook Events Manager | Incorrect Pixel ID or Access Token | Verify credentials in PixelFlow dashboard match those in Facebook Events Manager. Regenerate Access Token if needed. |
Duplicate events showing | Old Pixel script still present | Remove any existing Facebook Pixel scripts from Custom Code or Framer integrations. PixelFlow handles both Pixel and CAPI. |
Script causing page slowdowns | Script in wrong location or conflicting code | PixelFlow script is only 11KB and loads asynchronously. Verify it's in "End of head" only. Check for other heavy scripts. |
Buttons or elements disappearing after adding script | Conflict with Framer Code Overrides | This is rare but can happen with custom code. Try removing recent Code Overrides to isolate the issue. Book a free setup call for help. |
Low event match quality score in Meta | Missing user data in events | Add Event Classes to forms to capture email, phone, and name. See Event Classes on Framer. |
GDPR Compliance
If you need to delay script loading until user consent:
Use Framer's built-in cookie banner (free in Site Settings)
Connect it to Google Tag Manager
Configure GTM to load PixelFlow only after Marketing consent
See Cookie Consent in Framer for detailed integration steps.
PixelFlow is GDPR-compatible and respects cookie consent settings when properly configured.
Comparing Plugin vs. Manual Setup
Use the plugin if you want:
Automatic installation through Framer Marketplace
Visual wizard for guided setup
Activate/deactivate toggle without editing code
Automatic sync with PixelFlow dashboard
Use manual setup if you:
Prefer direct control over script placement
Want to manage all custom code in one location
Don't want to install additional plugins
Need to integrate with custom consent management
Both methods provide identical tracking capabilities and performance—the 11KB script is the same.
Getting Help
If you're experiencing issues with your manual Framer setup:
Check that your script is in "End of head tag" and your site is published
Verify your Meta Pixel credentials in both PixelFlow and Facebook
Use browser developer tools (F12) to check for JavaScript errors
Review the Events page in PixelFlow for error messages
Contact support at [email protected] or book a free setup call
When contacting support, please provide:
Your Framer site URL
Screenshot of your Custom Code section showing the script
Any error messages from browser console
Whether you're seeing events in PixelFlow or Facebook